How To Make New Leadership Authorized Signers
Whether it’s graduation, study abroad, or new member recruitment, there are plenty of reasons why a group’s Authorized Signers may need to change throughout the year. Please refer to the following steps below to transition your Authorized Signers:
Note: This process can only be followed if you already have Authorized Signers for an academic year. On March 1st, your group will need to register for the new academic year in order to nominate more Authorized Signers. Between February 15th and 28/29th, adding Authorized Signers is not available.
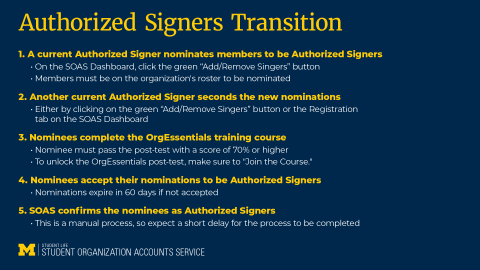
- A current Authorized Signer must nominate new Authorized Signers by logging onto the SOAS Dashboard. Once there, click the green “Add/Remove Signers” button to bring up a list of members. Click the check box next to their name, then “Nominate Selected Users.”
- A second, current Authorized Signer must then approve the new nominations. All Authorized Signers will receive an email to approve the nomination, or they can head to the “Registration” tab on the Dashboard to find that nomination.
- The nominee must then complete the mandatory OrgEssentials training. The nominee will need to pass the post-test in order to have their training considered complete. The training takes ~30 minutes to finish.
- The nominee must then accept their nomination which can be found on the SOAS Dashboard. Pending nominations can be found under the “Registration” tab on the Dashboard. Nominated Signers must electronically sign the agreements.
- Finally, SOAS will manually move over your new Signers. This is not an automatic process, so you can expect a slight delay.
Important notes to remember:
- Old Signers will remain unless they are requested to be removed.
- Groups still cannot have more than 10 Authorized Signers.
- Before removing any Authorized Signers, be sure that it will not drop your total below the minimum requirement of 3.